Sunday, July 12, 2020
Laying hardwood floors: Some tips to make the process more efficient
I'm mostly posting this so the next time we put down hardwood, which I hope will not be for many months but not forever, I will remember my method!
1. Open the box of hardwood boards. Use a tape measure to measure the length of each board (finished side). Use a Sharpie to write the measurement (rounded to the nearest quarter inch) on the back of the board. You can watch Hamilton during this part because you don't need to concentrate too hard. Only do keep in mind that math and music are closely related and if you find, like I did, that you cannot retain the numeral in your brain long enough to get it written on the board in Sharpie, maybe wait till this chorus is over and try again.Only good luck with that because it will still play in your head.
2. Lay the boards out on a big flat surface (my front porch floor served) in order by measurement, longest to shortest. Set the really short ones aside because when you need them, you'll need them, but you won't need them for every course. Might as well not look at them all the time. Also it's time to pause Hamilton because... math.
3. Measure the span each row will have to cover. If your rooms are like ours, you'll have a lot of rows of all the same length, plus some oddball rows that go into a doorway (so they're longer by an inch or two) or cross a floor vent (and thus are shorter in total, with a short end between the wall and the vent and a longer end between the vent and the other wall).
4.Math ! Figure out how many of each length rows you'll need. Divide the other dimension of the room (or space with that length of boards) by the width of your boards. We had 2-3/8 inch wide boards, which is 2.375 in decimal, so I divided the length of the room (113.5 inches) by the board width, and learned that I needed 48 rows of 144-inch length rows for the non-oddball rows.
5. Select your boards for each row. I sat down on the porch floor with a calculator (on my phone) and a tally sheet. I started at the longest boards and started subtracting their length from 144 to get to as close to 0 as I possibly could. It was fun, like a puzzle. Once I knew exactly which boards I needed for each row, I pulled them out of the row and stacked them in stacks at the other side of the porch.
6. I had to stop and reconsider my method, because when Barry took the first few stacks upstairs and started trying to nail them down, he said a lot of them were just a bit too long. See, I was so worried about my rows being too short that I was rounding down when I measured their length, and ending up with more than 144 inches per row. So I knocked down my stacks and started over, this time going for 143-ish inches. So far so good.
7. If you get thirsty, refresh! I pulled one of these babies out of the Basement Fridge and it cooled me right off. Sprecher's makes the most wonderful bottled root beer you ever tasted. With maple syrup. How great can that be? Imagine the best root beer you have ever tasted, and then turn the dial to 11. That's Sprecher's. I get ours at Menards. I never even add ice cream to it, that's how good it is.
P.S. Barry just delivered the crushing news that Pepsico now owns Sprecher's. But they must be allowing them some autonomy because they are still making great pop. (We're in the Upper Midwest. It's pop.)
Thursday, August 08, 2019
Our 1913 House: Living Room Remodel - The Big Reveal
I forgot I was posting pictures of the remodel project on this blog. :) Just updated Facebook. Anyway, yesterday our cabinet maker, John Pitts, in a final burst of energy, completed installing all the beautiful woodwork and then last night I moved our furniture back in and the living room is complete (except for some paint touch-ups and Barry is finishing restoring some of the old trim on the far side of the room). Here are photos from last night, of the main part of the room with the new woodwork.
The room is all I had hoped it would be: Warm, inviting, comfy, beautiful. The wood is quarter-sawn oak. All the boards are local from our area forests. The wood panels are not local, but are furniture-grade quartersawn oak plywood. John did a masterful job of designing the room, with great suggestions from period photos and drawings of Arts & Crafts living spaces, and executing his ideas beautifully. John said he has spent so much time in this house in the past few weeks that we should probably have him in our Christmas pictures. :)
You'll note there's no TV in this room. That was an edict I made when we moved into this house in October of 2002: No TV in the living room ever again. The living room is a place for conversation, for reading, for doing a puzzle, for sipping something delicious while enjoying the faces of those you care about. There are other places for staring at an electronic screen.
The room is all I had hoped it would be: Warm, inviting, comfy, beautiful. The wood is quarter-sawn oak. All the boards are local from our area forests. The wood panels are not local, but are furniture-grade quartersawn oak plywood. John did a masterful job of designing the room, with great suggestions from period photos and drawings of Arts & Crafts living spaces, and executing his ideas beautifully. John said he has spent so much time in this house in the past few weeks that we should probably have him in our Christmas pictures. :)
You'll note there's no TV in this room. That was an edict I made when we moved into this house in October of 2002: No TV in the living room ever again. The living room is a place for conversation, for reading, for doing a puzzle, for sipping something delicious while enjoying the faces of those you care about. There are other places for staring at an electronic screen.
Saturday, April 20, 2019
Another antique floor lamp redone and ready for use
Fresh from my success with that last lamp, I tackled another. This one is a little unusual in that the center reflector fixture is not a mogul fixture and apparently never was one. Still three lights in a cluster around it, and then also there is a nightlight in the base of the lamp, on a foot switch.
The whole lamp has always been frustratingly wobbly, never standing straight. So I hoped to fix that while I was at it. We have never used it. I bought it at a sale sometime and never did the work necessary to make it useful.
Before pictures:


I took the whole thing apart and cleaned it. Boy, was it in need of cleaning. Rusty on the insides of the iron pieces, corrosion on the other metals, and a horror of rotten wires inside. Plus a dead mouse. Not really. But you could have hidden lots of things in the cobwebs up inside the base, amongst bare wires. Scary.
After I scrubbed, derusted, and decorroded the metal parts, I sprayed all the parts except for the center rod and tube with a clear matte acrylic spray to protect them from the next round of moisture damage. Once they were dry, I began rewiring.
This lamp had key switches on each of the 3 cluster lights, and a key switch on the reflector light, and a foot push button switch on the nightlight - BUT there was also a push-button switch underneath the cluster that was a master switch for all the top lights. Okay for what it was, but not what I wanted, and that many key lights seemed weird to me.
I replaced all sockets on the top portion with new keyless sockets to simplify things. I kept the nightlight socket which was in great shape once cleaned up. I then rewired with a new 3-way rotary switch in the place where the push-button switch had been under the cluster body. I wired it a little differently than traditional, putting the cluster of 3 on the primary switch, the center reflector light on the secondary, and then the tertiary position was all three on at once.
The reason for the wobbliness I'm embarrassed to say I never really solved. The center rod is not long enough for the way the lamp is set up. The last person to work on the lamp had decided to move it up higher so that it held the reflector socket in place, but this meant it did not go all the way down to the base and that's where the wobble was. Basically it was a plastic piece holding the whole lamp upright, and not very well. I elected to use the rod with the threading making good contact at the base, for stability. But this meant it only connected at the top where the cluster body connected, and the reflector lamp was left hanging by its cord. I "solved" this by using plumber's putty to first settle the porcelain reflector socket inside its holder, then fasten the holder to the cluster body, pulling up the slack on the cord inside the cluster body. I held my breath to see how this worked, and it was successful: The center reflector light is solid and firm and doesn't seem like it's anything less than attached the way it's supposed to be. This morning after the putty was dry I used a gold metallic oil-based Sharpie pen to color the putty this morning and everything looks really good (to me).
Again, we used Edison-style LED bulbs, this time with an amber tint. And this lamp already had an opal glass shade for the reflector light so I went ahead and used it.


And the base, lit and unlit:


Finally the lamp base, which is made of cast iron, has 6 little bare metal feet that can scratch a nice floor, so this morning I used 2 packages of black Sugru modeling compound to form 6 little "socks" for the feet. The weight of the lamp now rests on this and it's drying.

By tomorrow morning this lamp should be ready for use.
The whole lamp has always been frustratingly wobbly, never standing straight. So I hoped to fix that while I was at it. We have never used it. I bought it at a sale sometime and never did the work necessary to make it useful.
Before pictures:
I took the whole thing apart and cleaned it. Boy, was it in need of cleaning. Rusty on the insides of the iron pieces, corrosion on the other metals, and a horror of rotten wires inside. Plus a dead mouse. Not really. But you could have hidden lots of things in the cobwebs up inside the base, amongst bare wires. Scary.
After I scrubbed, derusted, and decorroded the metal parts, I sprayed all the parts except for the center rod and tube with a clear matte acrylic spray to protect them from the next round of moisture damage. Once they were dry, I began rewiring.
This lamp had key switches on each of the 3 cluster lights, and a key switch on the reflector light, and a foot push button switch on the nightlight - BUT there was also a push-button switch underneath the cluster that was a master switch for all the top lights. Okay for what it was, but not what I wanted, and that many key lights seemed weird to me.
I replaced all sockets on the top portion with new keyless sockets to simplify things. I kept the nightlight socket which was in great shape once cleaned up. I then rewired with a new 3-way rotary switch in the place where the push-button switch had been under the cluster body. I wired it a little differently than traditional, putting the cluster of 3 on the primary switch, the center reflector light on the secondary, and then the tertiary position was all three on at once.
The reason for the wobbliness I'm embarrassed to say I never really solved. The center rod is not long enough for the way the lamp is set up. The last person to work on the lamp had decided to move it up higher so that it held the reflector socket in place, but this meant it did not go all the way down to the base and that's where the wobble was. Basically it was a plastic piece holding the whole lamp upright, and not very well. I elected to use the rod with the threading making good contact at the base, for stability. But this meant it only connected at the top where the cluster body connected, and the reflector lamp was left hanging by its cord. I "solved" this by using plumber's putty to first settle the porcelain reflector socket inside its holder, then fasten the holder to the cluster body, pulling up the slack on the cord inside the cluster body. I held my breath to see how this worked, and it was successful: The center reflector light is solid and firm and doesn't seem like it's anything less than attached the way it's supposed to be. This morning after the putty was dry I used a gold metallic oil-based Sharpie pen to color the putty this morning and everything looks really good (to me).
Again, we used Edison-style LED bulbs, this time with an amber tint. And this lamp already had an opal glass shade for the reflector light so I went ahead and used it.


![]() |
| These were taken before I Sharpied the plumber's putty. The next one shows it with the color corrected. |
And the base, lit and unlit:

Finally the lamp base, which is made of cast iron, has 6 little bare metal feet that can scratch a nice floor, so this morning I used 2 packages of black Sugru modeling compound to form 6 little "socks" for the feet. The weight of the lamp now rests on this and it's drying.

By tomorrow morning this lamp should be ready for use.
Our 1913 House: Remodel, Continued
Frog and his son DJ, with help from other contractors, have made great progress on the front rooms remodel. They have removed all the lathe and plaster from walls and ceilings, removed the center wall (while bracing up the second floor), put in a lam beam to hold the weight, framed in the outer walls, replaced a window, added lots of good wood bracing and framing both to reinforce the weight of the second floor and to provide space for spray insulation, and have replaced/moved some ductwork. There's just a little bit more framing to do, I believe, then electrical, then insulation, then drywall.
Some pictures:


Some pictures:


Friday, April 05, 2019
Our 1913 House: Living Room(s) Remodel Begins
I'm excited to share that the last part of our first floor that is not insulated is up for its turn for remodel! Our house (built in 1913) has two front rooms. We call them "the living room" and "the other living room." They are divided by a wall with a doorway that once closed with pocket doors. There's stained glass in one window of each room.
Today the demolition started and this video shows you what it looks like:
I'll post more as we go.
Today the demolition started and this video shows you what it looks like:
I'll post more as we go.
Monday, March 25, 2019
Christening gown from wedding dress

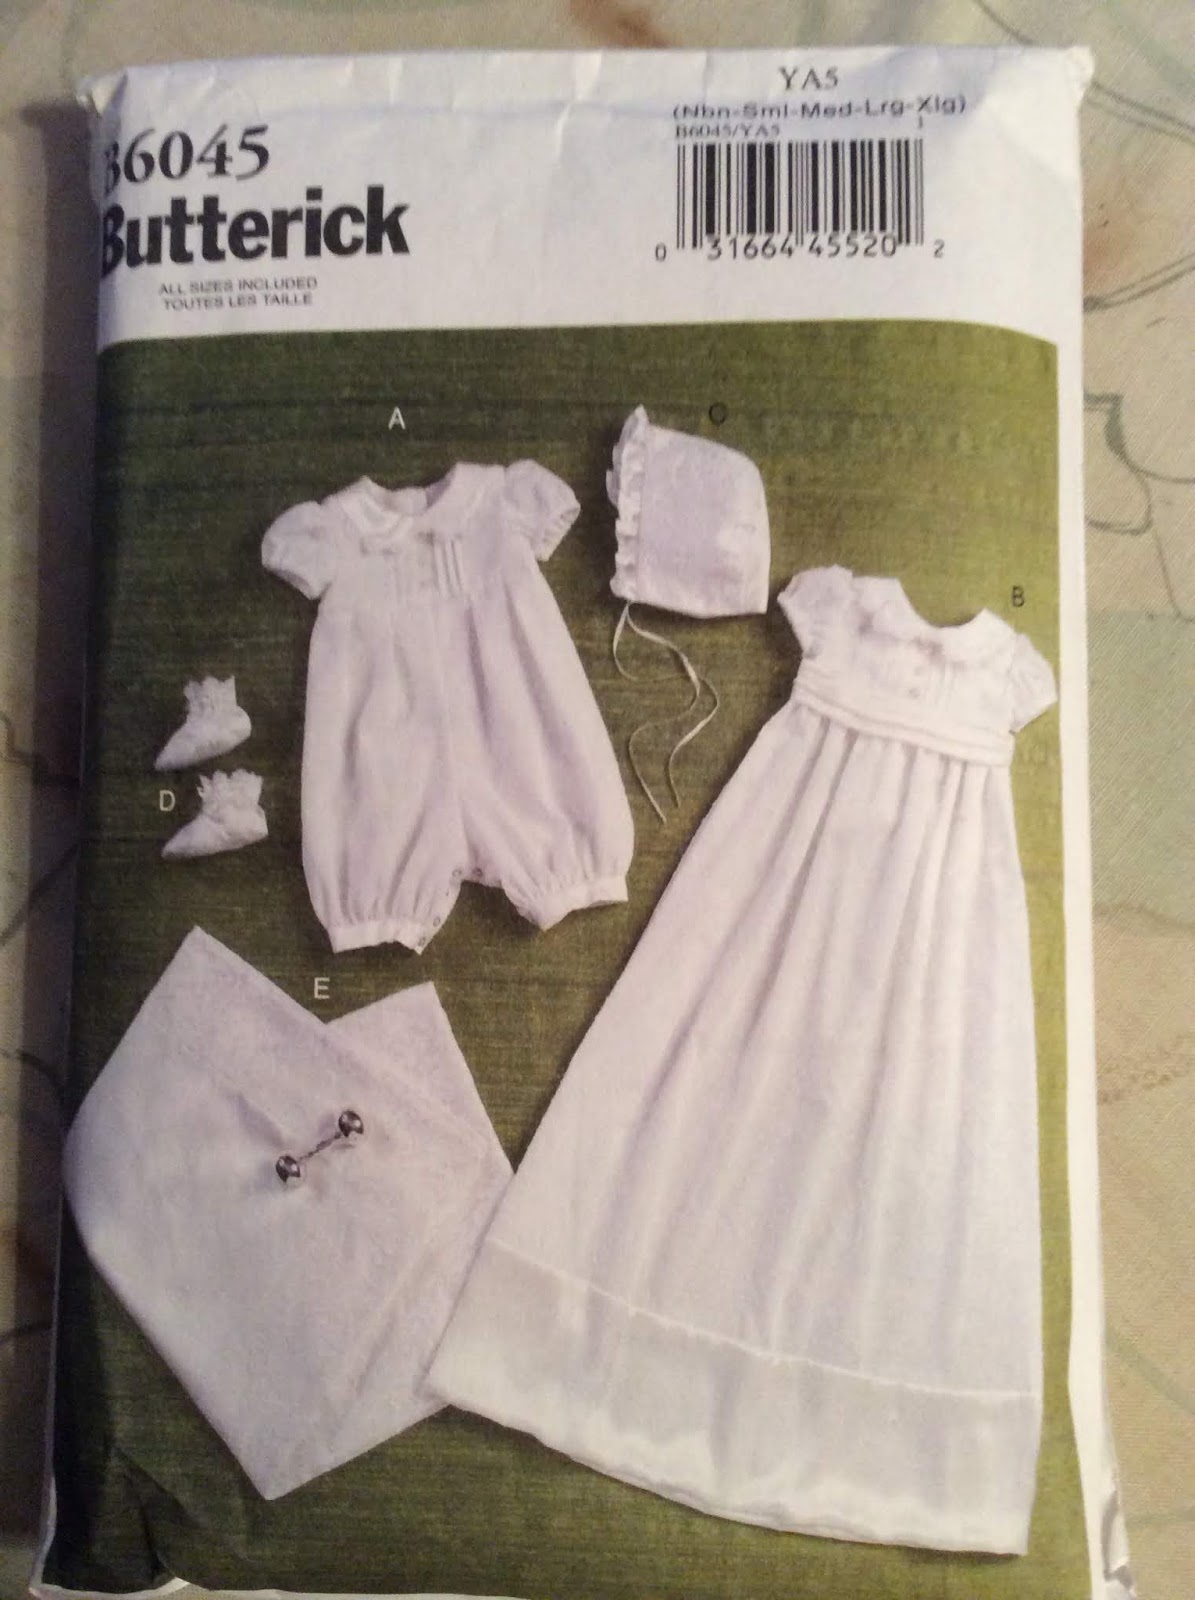
We are expecting a new grandson in June, our youngest's child. A few months ago she asked me how I felt about making a christening gown for him from my own wedding gown, since she had not one of her own. (I had made a gown from her sister’s wedding dress.)
My wedding dress, though I loved it at the time, is very dated to the mid-1980s, for good reason. Lots of fluff and lace and froufrou. Not my daughter’s size or style. As no one will likely ever wear it again as a wedding gown, I was thrilled to be asked to repurpose it. I used Butterick 6045, the same pattern I had used for her sister’s. The thing about using a repurposed wedding gown for a christening dress is, you can reuse so much of the fancy work simply by careful cutting of the skirt to incorporate the existing hem. Some of the bias lines are going to be off a little bit, but it still works. So while this looks like a lot of work on this dress, honestly it wasn’t as much as it appears.
The only things that are not original to the dress are the thread and some interfacing. Everything else came from the dress: fabric, lining, lace, ribbons, beadwork. Oh, and buttons!
If anyone has a wedding gown to reuse and would like to give it a try, I would be happy to consult.
Thursday, March 21, 2019
Goodwill find: Printed cotton yardage from Cameroon
I realized I had this post in draft from last summer and never posted it. No time like the present!
While thrifting at Goodwill, I found two 5-yard pieces of printed cotton yardage from Cameroon, West Africa. Of course I bought them. They had paper labels reading CICAM, which, on researching, I found means they were the product of an initiative to help Cameroonian people to market their skills and traditional produce during the 1970s.
I made two kaftans out of them and wore them a few times before it got too cold for cotton last autumn. Looking forward to being able to wear loose, lightweight, breezy clothes again someday!
While thrifting at Goodwill, I found two 5-yard pieces of printed cotton yardage from Cameroon, West Africa. Of course I bought them. They had paper labels reading CICAM, which, on researching, I found means they were the product of an initiative to help Cameroonian people to market their skills and traditional produce during the 1970s.
I made two kaftans out of them and wore them a few times before it got too cold for cotton last autumn. Looking forward to being able to wear loose, lightweight, breezy clothes again someday!
Non-plastic beeswax blend food wraps project
A few months ago I ordered my first set of waxed fabric food wraps from etee.com (etee stands for Everything Touches Everything Else). I had never tried wax wraps before. Once I had the family trained on how to use them (no, you don't throw them away, no, you don't use hot soapy water to wash them, no, you can't leave them in the bottom of the sink in a pool of sludge), we were sold. Except for one thing: Plastic wrap and plastic bags are transparent, and these aren't. Barry complains frequently about all the mysterious blobs wrapped up in canvas in the fridge and gets tired of opening them to see what's in there over and over again.
This morning I took half a day off work for a dental appointment which, due to miscommunication, was only an hour long instead of three (I thought I was getting a crown, but I have to go back another day for that), so I had some time on my hands. I had collected the supplies to try the wraps explained on the blog at Mountain Rose Herbs. I had plenty of beeswax already, and had previously ordered jojoba oil (actually it's a wax, but a liquid wax) and copal resin (from pine trees, basically dried sap). I collected pure cotton quilting fabrics with prints of fruits and veggies and cut them into roughly 12-inch squares with pinking shears. Then I got to work.
I melted the copal resin in a double boiler (and it took nearly an hour, so allow time for that), then added grated beeswax and jojoba oil in double the proportions directed as I figured since I was going to the effort I might as well do a bunch. The copal resin did not want to incorporate into the waxes, but with patient stirring, eventually it did. When all the waxes were finally melted and blended, I spread my fabric squares on baking sheets (I didn't have any parchment paper), and used a 3-inch foam brush to spread the liquid wax quickly over the fabric. I'd recommend a foam brush for you, also. Very easy and no bristles to come off!
I followed the directions to warm the squares in a medium hot oven and spread the liquid around until the squares were completely saturated, then cooled and washed them.
And here's the result. I probably used too much wax on each one as they are pretty stiff, but having worn out a couple of the etee wraps already, I would rather err on too much than not enough wax, as you lose a little bit every time you use and wash one of these. You can see some excess on the tomato wrap.
And here's the onion wrap with half an onion in it.
Now we'll know which fabric-wrapped blob in the fridge is part of an onion, which is a leftover half of a sweet pepper, which is a half lemon, and which is a tomato half to slice for a sandwich.
I'll be watching for fabric depicting other fruits and veggies in time to come.
This morning I took half a day off work for a dental appointment which, due to miscommunication, was only an hour long instead of three (I thought I was getting a crown, but I have to go back another day for that), so I had some time on my hands. I had collected the supplies to try the wraps explained on the blog at Mountain Rose Herbs. I had plenty of beeswax already, and had previously ordered jojoba oil (actually it's a wax, but a liquid wax) and copal resin (from pine trees, basically dried sap). I collected pure cotton quilting fabrics with prints of fruits and veggies and cut them into roughly 12-inch squares with pinking shears. Then I got to work.
I melted the copal resin in a double boiler (and it took nearly an hour, so allow time for that), then added grated beeswax and jojoba oil in double the proportions directed as I figured since I was going to the effort I might as well do a bunch. The copal resin did not want to incorporate into the waxes, but with patient stirring, eventually it did. When all the waxes were finally melted and blended, I spread my fabric squares on baking sheets (I didn't have any parchment paper), and used a 3-inch foam brush to spread the liquid wax quickly over the fabric. I'd recommend a foam brush for you, also. Very easy and no bristles to come off!
I followed the directions to warm the squares in a medium hot oven and spread the liquid around until the squares were completely saturated, then cooled and washed them.
And here's the result. I probably used too much wax on each one as they are pretty stiff, but having worn out a couple of the etee wraps already, I would rather err on too much than not enough wax, as you lose a little bit every time you use and wash one of these. You can see some excess on the tomato wrap.
And here's the onion wrap with half an onion in it.
Now we'll know which fabric-wrapped blob in the fridge is part of an onion, which is a leftover half of a sweet pepper, which is a half lemon, and which is a tomato half to slice for a sandwich.
I'll be watching for fabric depicting other fruits and veggies in time to come.
Wednesday, March 20, 2019
Antique reflector type floor lamp rewire project
I have had this old floor lamp which needed rewiring for a long time. Finally decided to check that task off my project list. Last week I bought the lamp wire and a new switch, and rewired it using the instructions at Antique Lamp Supply.
With these lamps, the three smaller bulbs are on one switch, and they can be lit with one, two or all three depending on where the switch is. The large center bulb is on its own circuit, and in most cases is a mogul size bulb base, which Antique Lamp Supply refers to as “useful for landing personal aircraft or signaling vessels lost at sea”, which really isn’t too much of an exaggeration.
Once the lamp was rewired and working again, I replaced the three smaller bulbs with visible-element vintage style LED bulbs purchased from Menards. I wanted to replace the mogul bulb with LED also. Mogul base LED bulbs are very industrial looking. I could not find any that were even remotely related to “pretty”. I could have bought or scrounged an opal glass shade for the center light ($40-50 if I could not thrift one), which would have made the looks of the bulb immaterial, or I could have given up on LED and just used an incandescent mogul base bulb (expensive on power, and a heat producer), but then I learned that there is another choice, an adapter to allow a “normal” (or E26, to be more exact) bulb to work in a mogul (E39) socket. And I could find many choices of large visible-element E26 LED bulbs that are attractive and reasonably priced. So that’s what I decided to do. The UPS truck just dropped off the adapter and a large globe bulb, and here is my lamp.
I really like the look.
With these lamps, the three smaller bulbs are on one switch, and they can be lit with one, two or all three depending on where the switch is. The large center bulb is on its own circuit, and in most cases is a mogul size bulb base, which Antique Lamp Supply refers to as “useful for landing personal aircraft or signaling vessels lost at sea”, which really isn’t too much of an exaggeration.
Once the lamp was rewired and working again, I replaced the three smaller bulbs with visible-element vintage style LED bulbs purchased from Menards. I wanted to replace the mogul bulb with LED also. Mogul base LED bulbs are very industrial looking. I could not find any that were even remotely related to “pretty”. I could have bought or scrounged an opal glass shade for the center light ($40-50 if I could not thrift one), which would have made the looks of the bulb immaterial, or I could have given up on LED and just used an incandescent mogul base bulb (expensive on power, and a heat producer), but then I learned that there is another choice, an adapter to allow a “normal” (or E26, to be more exact) bulb to work in a mogul (E39) socket. And I could find many choices of large visible-element E26 LED bulbs that are attractive and reasonably priced. So that’s what I decided to do. The UPS truck just dropped off the adapter and a large globe bulb, and here is my lamp.
I really like the look.
Friday, February 22, 2019
1950 "Golden Anniversary" Columbus Blenback Oil Cloth Sample Book
Okay, so it was a shorter one and didn't take long. Figured while I was at it...
1940s Columbus Coated Fabrics "Blenback" Oilcloth Samples
I have three oilcloth sample books in my possession. I finally scanned the 1940 book to share because it is cool and because they don't last forever, and I'm amazed this one is still in as good shape as it is (oilcloth sticks to itself with time and temperature changes and eventually the pages all clump together in a block and the sample books are useless). The only thing is I cannot offer smell-o-vision because the smell of oilcloth is so distinctive, and all those of you out there whose grandmas had oilcloth tablecovers in their kitchens would be instantly transported back if you caught a whiff.
Here are some selected pages for your instant enjoyment:
Tuesday, September 11, 2018
Handling my mother's estate and what I learned from it
![]() |
| My precious mama's hand in mine, shortly before her death. |
I have never been anybody's executor before. It was a chance to serve Mom one last time, even though she is not here any longer. It was a chance to serve my brother and sister also. They live far away, and it made sense for me to be the one to assist in this way, and it was my honor to do so. I'm also a control freak and probably would have driven my brother or sister crazy had one of them taken on the task! It was a lot of work, but I learned a lot from the experience, and I'd like to share what I learned for those of you who are in a similar situation, or may find yourself there someday.
1. It's easier if the decedent and executor reside in the same state.
We had moved Mama from her home in Minnesota first to Wisconsin for a couple of months, then as she declined further, to a nursing home in Lansing, Iowa, where I could be close for visits. So her legal residence was Iowa at the time of her death, as is mine. Being a resident of the same state (and indeed the same county) made things easier from the start. One set of state laws to obey, one court system to navigate.
2. If there is any real property, try to sell it while the owner is still living.
As Power of Attorney (POA), you are sworn to act in the best interests of the person, not yourself. If it's your parent, you have the additional responsibility of treating your parent with loving respect, and if she says she is sure she will be going home very soon and you know she won't, it may feel very weird to go ahead and take the steps of selling her house or her car, but truly it is in her best interests to do so. Our mom had agreed to sell her house when she made the initial move to Wisconsin, to an assisted living apartment, but with mental decline, she forgot that decision, and talked often of going home. It was quite clear to all of us that she would never be safe on her own again. We did sell her house, and then her car, and set aside the funds for her living expenses in the nursing home. We did not do it to make things simpler when she died, but that's how it ended up. I'll explain that in #4.
3. Part of the liquid funds should be stored in bank accounts with a "payable on death" clause.
After my dad's death, Mom started to update the beneficiaries on her retirement accounts and insurance, but did not get very far with it. I helped her as her POA. While I was looking into this, I learned that bank accounts, too, can have beneficiaries if they are set up as "payable on death." We consolidated Mom's accounts from about six banks (as a Depression kid, Mom liked to spread her money around to different banks, because you just never knew) to one national bank with branches all over the country and electronic billpay. While we were at it, we made the savings account payable on death, with the three of us kids the beneficiaries. The benefit here was, soon after Mom's death when we received the death certificate in the mail, we were each able to go to a local branch of her nationwide bank and receive the funds from the split of that bank account immediately, without it having to go through probate. This account was really the bulk of Mom's assets.
Since then, Barry and I have set our savings account up this way, so that when the time comes, our three kids can have the funds from that account well before the estate is settled.
4. Look into "small estate" laws. If the estate qualifies, this is hugely preferable to full probate.
I learned that many states, Iowa included, allow very small estates not to go through probate. Iowa's limit is $25,000 at this writing, as long as there is no real property. This turned out to be another blessing of having sold Mom's house before she died: No real property. And since all but a little of her other assets were either in retirement funds or the payable on death bank account, her remaining funds were very small - enough to bury her, set her gravestone, and pay the last of her bills. Well under the limit for small estates. While there was still a need for some of the work of probating the estate, it was much simplified. And administering it as a small estate made possible #5:
5. Consider the crazy idea of - gasp - not using an attorney.
I have a bit of a queasy feeling recommending this, so I'll just say, it worked for us. I did a lot of reading. I read Internet articles, but I also read the actual Iowa state code on administering a small estate. I took good advice from my mother's banker, and I discovered a goldmine of information in the clerks of court at our county courthouse. They dispensed excellent guidance (as differentiated from legal advice) and pointed me in the right direction for my research, and helped me get back on track when I missed a step. They did this with kindness, compassion and patience. I was careful not to abuse them, and I hope no one else will do so either.
I also had an attorney in mind to step in if I got to the point where I needed help. I did not go into this with a plan that I would absolutely not use an attorney. I went into it planning to do as much as I could effectively do without one, but kept my options open. If your family is not getting along well, don't even try. If you are not communicating well, don't try. If there is any chance that anyone in the family will suspect you of wrongdoing in any way, don't try. In those cases the attorney fees would have been worthwhile. In our case, with the three of us talking daily (through a Facebook chat), with our loving spouses all giving us support and space to accomplish this, with the trust we had built over the past few years of looking after our parents together, and with the transparency upon which I insisted, i.e., overkilling them with information on what I was doing, we were all confident moving ahead with this. Families under stress act strangely. I thank God and my siblings, and their families, for how well we got through this together.
As for the actual paperwork to file, the Iowa state code told me a lot about when to file which document, and frequently what verbiage should be in the document. I tried to keep it simple. I formatted the documents in the way the court did, for the first document they sent me, and kept the naming convention the same throughout, always putting the case number in the file name. I skipped legalese and kept my language as straightforward and concrete as possible. Sometimes I found samples on line. (Remember that they are state specific.) I identified people any time I mentioned them for the first time in a document (the decedent, the personal representative). I think I filed at least one document I didn't really need to file, but that's okay. It was transparency, and it put everything I was doing on record in case it should ever be questioned.
6. Bite the bullet and get an estate TIN (taxpayer ID number).
I was well into things before I was asked for the estate TIN. I had not gotten one. I had been using Mom's social security number. But one of the retirement account companies wanted it. And then later that same day, another one wanted. It was sort of the Bader-Meinhof effect in action, I guess. Anyway, I groaned, whined, and finally bit the bullet. I applied for the TIN. Turns out it's a completely electronic process that took just a couple of minutes - and I had the TIN within a couple of hours. Shoulda done that from the start.
7. If possible, be an Iowan.
I would say this about so many things. I love Iowa! I'm not a native, but I am deeply attached to my adopted state, and this experience with administering my mother's estate just solidified that. The Iowa State court system is amazingly technologically advanced! I only actually set foot in the courthouse once, and that was at the very beginning, when I did not know how to start, and stopped in for a chat with the clerks of the court. Ever after that, everything was done electronically. The courts system has an excellently set up web site where we submit all paperwork and have all paperwork returned to us. The turnaround time is phenomenal! One petition I filed electronically on a Friday during the lunch hour was processed, accepted, and responded to within... get this... 20 minutes. I'm serious. If I had to drive to the courthouse and drop off paperwork, wait for the mail, wait for court dates, none of this would have been so slick. They were fabulous. I cannot speak highly enough of this system.
In conclusion, in retrospect, I put a lot of hours into this task, and had I had an attorney, I would have saved some time, but there was not a ton of money to speak of, and for us it was worth the effort to save the attorney fees. I had a strange feeling when I did the last task of the estate and was released from my duties. Relief, sadness, nostalgia. Thankfulness that I could do this for our family. Interest in blogging for the first time in months.
Peace.
Subscribe to:
Posts (Atom)