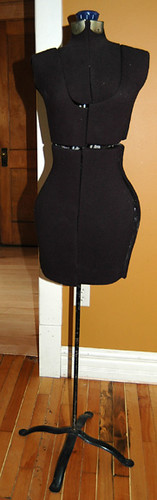
 Remember Mabel the Dress Form? I originally got Mabel from a Salvation Army thrift store in Pasadena, California. She was in good shape, just purplish; she was covered with purple doubleknit fabric. I recovered her in black and we have been friends ever since. However, Mabel is shaped quite a bit like me (flat chested, big butt, hefty waist), so the wire dress form that I got more recently did better for modeling stuff I wanted to sell, like aprons. I really miss that dress form. I got to wondering if I could make a replacement for her. After reading lots of instructions on making your own dress form, I decided to meld them and see if I could make one with just the stuff I had around here.
It provided hours of hilarity for my family. Learn, children, from my mistakes. The photos that follow will show you how I made my dress form, minus many of the false starts and messes that occurred along the way.
We started with an old floor lamp that I had dumpster dived for. The lamp was broken at the top, with one of the pieces (pot metal painted bronze) snapped right in half. But look at those interesting pieces when I took it apart:
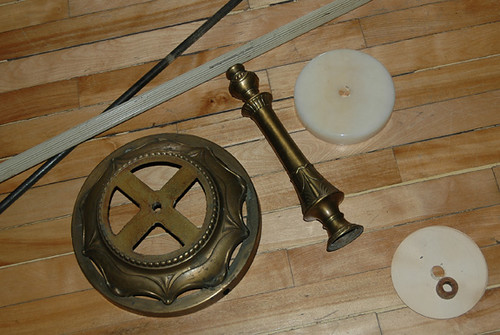
I cleaned all the parts in dishwater and dried them.
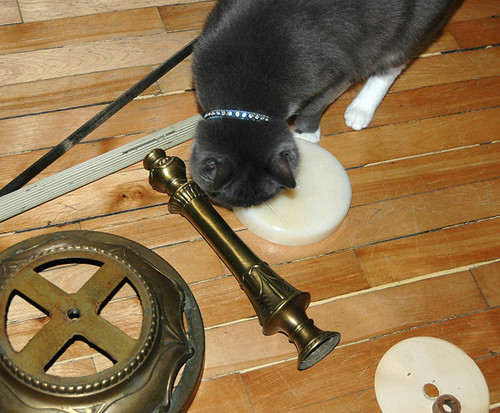
Here's my first piece of advice: If someone offers to help, say, "Yes, thanks." That's Beckham there, checking out the lamp parts. He has pretty good taste. That thing he's sniffing was a smooth disk of inch-thick cream-colored marble. Very pretty.
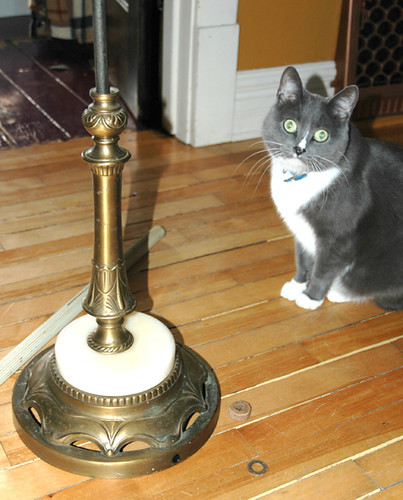
Now Beckham and I have begun putting the lamp back together, minus the wiring. We realized that without the top part of it, where the shade and bulb go, the whole thing would not hold together. I found a nut in Barry's tool bench that fit the threads of the center pipe thingie on the lamp, to keep everything in place, more or less.

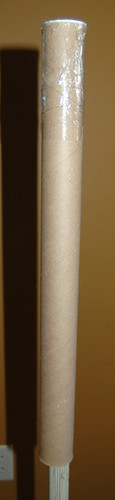
Next we took a mailer tube and threw away the plastic cap from one end, and taped the other one on so it won't get away. We put this on top of the lamp pole. It's not fastened there, it's just resting.
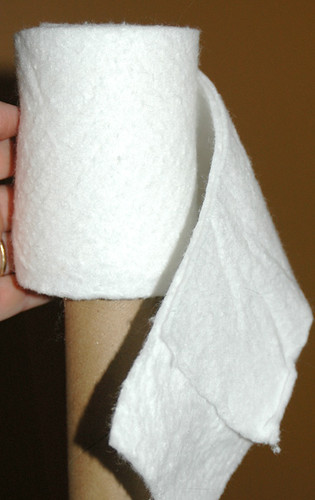
Next I started to wind a strip (about 5 inches wide) of scrap quilt batting around the mailing tube to form the neck of the dress form. This turned out to be a stupid idea, but the pictures make it look like I knew what I was doing, so I'll leave them in. Do not do this.
I put a little bit of white glue under the end of the batting to hold it in place.
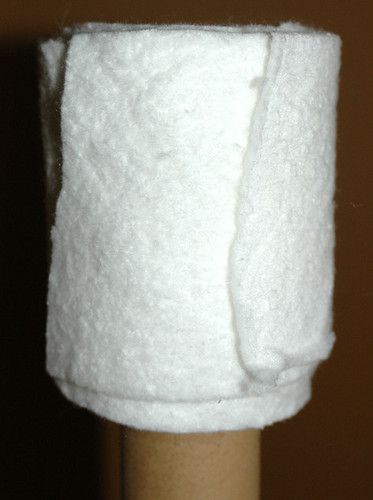
Next I wrapped a wider scrap of batting around the tube below the neck part. See what I mean? Stupid. Next time I'll do it all at once, and then stop winding at the neck part so that it stays narrower than the body.
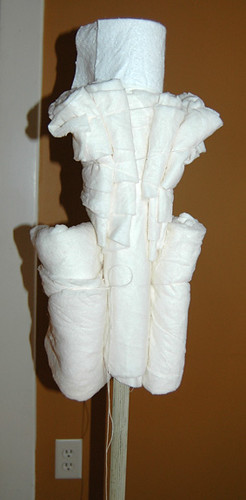
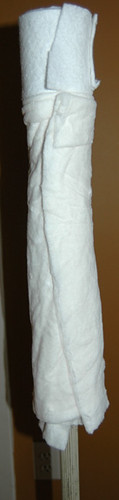
Next, I started adding rolls of batt strips to shape out an hourglass figure for this lady. I was beginning to attract a crowd - a jeering, critical crowd with lots of unhelpful suggestions.
By the way, glue wouldn't hold those rolls on, so I started tying them around with heavy cotton thread. That turned out to be a pretty good idea, actually.

Now I wrapped the torso up loosely in some thick, fluffy batting.

There's that thread again. Now I am using it to shape the torso in at the waist and start to add some definition.
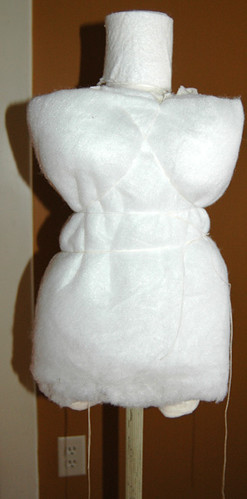
Underwire thread. It lifts and separates. (A little extra padding under that top layer there.)
I started wrapping the whole body in cotton batting strips. The net effect was that the boobies got flattened down.
So I added more oomph. (Actually this wasn't the final version. I didn't take a picture of that. I ended up cutting circles of batting, basting them down and then stuffing them with fluff.) Oooooh, the peanut gallery was really having a great time by this point.
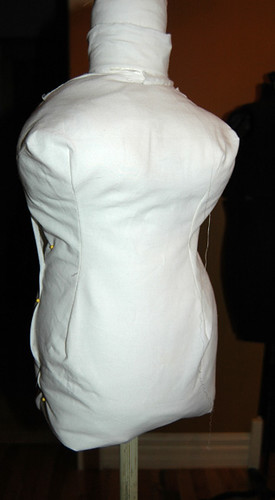
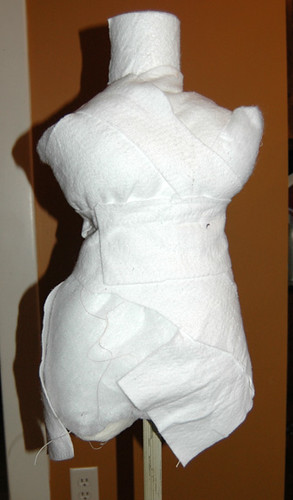
Next came a long, grueling period of time where I used unbleached muslin to make a covering for the figure. I cut a hunk of muslin, made a hole for the pole, and then basically just draped and tucked and pinned and darted and tucked and pinned and basted and fitted it to the form, on and on, ad nauseam. I will spare you all the trials and errors. At least this part bored my audience to the point where they all left for something more interesting.
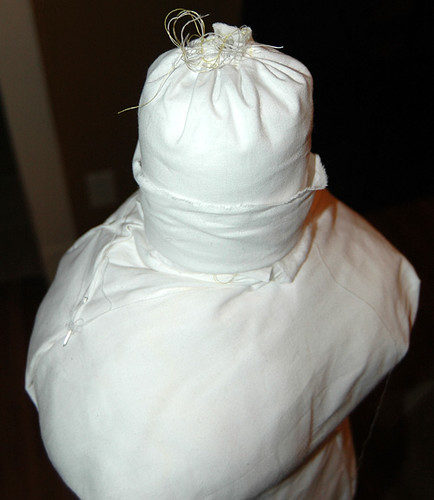
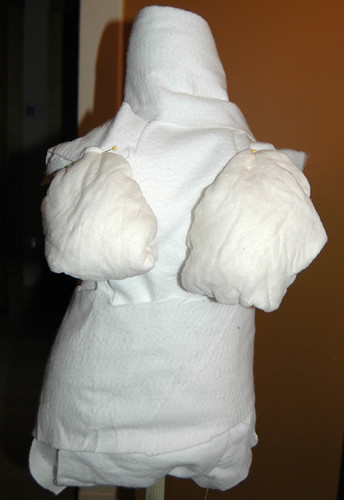
I covered the neck with a longish tube of muslin with the end gathered. I pulled up the gathers and then glued a circle of white felt to the top of the neck to cover everything neatly.
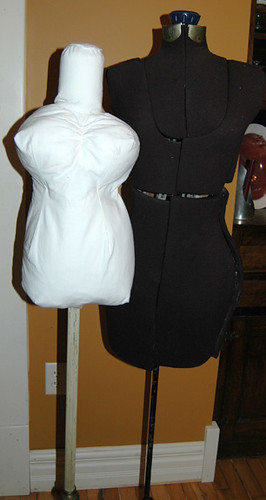
Voila! There she is! Wait a minute. I wanted her petite, but this is ridiculous. She's a miniature mutant with weird boobs.
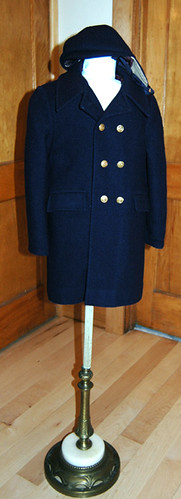
But all was not lost. I realized she would work well as a child modeling form. Here she is, modeling a child's wool coat and cap. She worked even better when I turned her body around backwards in the coat.
Okay, so this was not a success, but it wasn't a total failure either. AND since the body is not attached to the lamp base, I was thinking I'd try again with more figures and just swap them out to suit my needs.
Stay tuned, and another day I'll tell you How Not to Make a Papier Mache Modeling Form.
3 comments:
Laughing so hard, trying not to wet my pants! All in all I think your project ended well.
Cathy
Did you name her/him/it?
Mike... Hmmm. I think I'm going to have to go with Pat.
Post a Comment